Hints and Tips
Overview
Over the course of the next few lines I hope to instruct new modellers and possibly some experienced modellers in the techniques we use to create and finish our models. I hope that these tips and instructions will help you understand your model a little bit better and allow you to build them with relative ease.
George
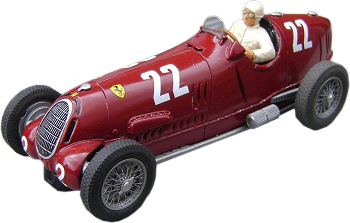
Some modellers are wary of what is involved in making a resin model. I can assure you there is no reason to be, resin is light and relatively strong which makes it an ideal material for making limited run slot cars such as those we produce. Over recent years resins have improved considerabl, giving them a degree of flexibility not unlike plastic. So it is fair to say that if you have built a plastic kit you can build a resin kit.
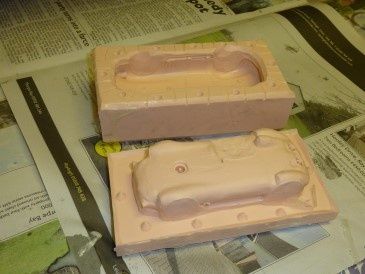
The process we use to make the kits goes something like this. After I have made a prototype of the model a Silicone rubber mould is produced. Most of these are two part male and female moulds (the core or interior mould being the male part) but we have exceptions for smaller parts. Once we have the mould we use a two part resin, a 50/50 mix is made and poured into the female section of the mould. Prior to this we spray the mould with a release agent to insure we can remove the casting of resin smoothly and to increase the life of the rubber (ordinarily you will get around 30-40 shots from the rubber doing this). We then place the mould into a vacuum tank to degas for around a minute. With that done the mould is removed from the tank and the male component is pressed down into the mould to remove excess resin and left for 30 minutes to cure. After which hey presto you have a moulded model car. All you need to do now is make a mould for all the other bits; the chassis, driver, headlights etc. Then the vac formed windows and interior. Then you have to get the artwork done so you can have decals printed. And oh yes you may have to get photoetch parts made. Now we are about ready to to produce a kit.
(We didn't want you all thinking it was too easy to do our bit. The next bit, your bit, however is easier)
Tools
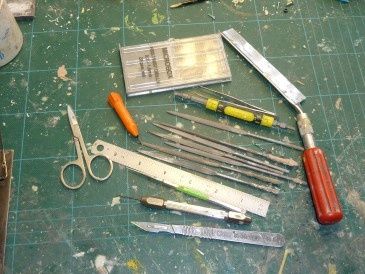
First off it is important to know that a few simple tools will come in very handy. Fortunately you will not need anything expensive to make a resin model.
I reccommend having access to the following.
- A few needle files, nothing too expensive as the resin is fairly soft.
- A box of small drills plus a pin vice.
- Nail scissors (or any very small scissors)
- Razor Saw
- Wet and Dry sand paper
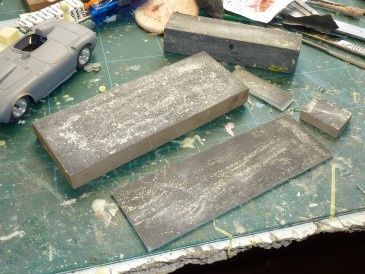
- A sanding block (very useful, just stick your chosen grade of wet and dry to a flat surface).
- Your chosen paints.
- Cellulose thinners.
- Disposable gloves.
- Filler and or Plastacine.
- Mutton cloth.
- Car polish.
- Super Glue.
- Most Importantly a Swann-Morten scalpel holder No.3 and 10A Knife blades. The 10A blades do it all so they will be all you need.
Initial Preparation
The first thing with any resin kit is to clean up and remove all flash and unwanted excess from the castings. This is easiest done using a scalpel, needle files and fine wet and dry sand paper. Small components are easier to clean up if they are still on the sprue (and you are less likely to lose them). In some cases a small amount of filler (we use Isopon P38) may be needed to fill small air bubbles and imperfections in the casting, usually this will be minimal but it is important to note that all of our castings are hand made, nothing about our process is automated. So if something has gone wrong, it is usually good old human error... In other words our fault... Woops. Plastacine can also be useful for small imperfections and can be applied precisely with a scalpel.
With all the parts cleaned up it is important to make sure everything fits together easily and you know where all the parts go. We hope it is fairly obvious how the kits fit together and none of it should be overly complicated. If you need a reference I can suggest using the pictures on the product listing.
Resin components, including bodies, can warp a little. This can be rectified easily by emersing the warped part in hot water. This will soften the resin enough to straighten out the offending part.
Painting
Before you paint any model it is a good idea to wash all parts in warm (but not too hot) water and if possible dip in cellulose thinners. This removes any excess release agent, which will likely react with the paint, and dust from the surface. Be extra careful not to lose any small parts down the sink, I have done this too many times to count now. If you feel like it, you can rub the casting with a fine wire wool for an extra key but remember to wash after. With that done you are now ready to paint.
Nearly every model on the site, with the exception of the orange Mclarens and Blue Talbots and Gordinis (which are painted with Tamiya spray paints) are painted with automotive acryllic spray paint. In the UK we have Halfords however I imagine other versions are available throughout the world.
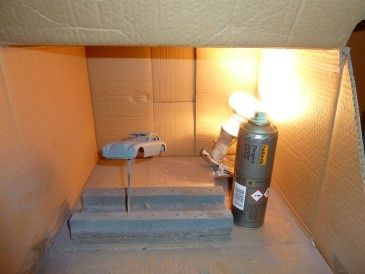
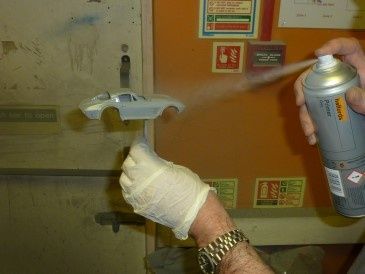
Where neccesary to hold and spray parts, you need to mount the component onto a stick, we use bamboo or BBQ sticks. It is always advisable to spray in a warm, dry and well ventilated atmosphere. This is not always possible, especially in England so a handy thing to have is a cardboard box about 35cm cubed with a heat source, such as a halogen bulb inside, to make a type of spray/ drying booth. It is also important to follow the instructions of whatever paint you are using. The technique usually comes down to practice, but it does not take long to pick up. Remember if you make any mistakes place the part into cellulose thinners as this will remove the paint and allow you to start again. It is always annoying when this happens but believe me it happens a lot in the workshop.
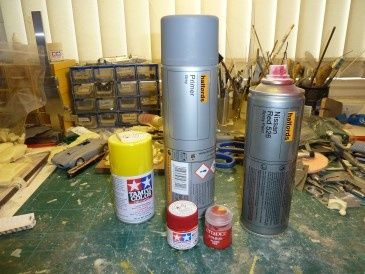
Before you spray on the main colour you will need to prime the item. In most cases grey primer is best but red primer for red cars and white primer for white cars are better. Leave the primer coat to dry for about an hour. Do not leave the heat on in the box while the castings are drying, just use it to get the temperature up to a comfortable level when neccessary. At this stage a box with no heat is still Ok as it will stop any overspray or bits of stuff falling onto your model.
When the primer is dry check for imperfections such as pinholes which sometimes appear. These can be filled with a tiny bit of plastacine. Now rub any excess dust with 800 or 1200 wet and dry paper. Reapply the primer if you think it is neccessary.
Gluing and Fitting

Applying Decals
First cut out the decal you wish to apply, do one decal at a time. Dip the decal in water and remove it from the water and allow it to soften. When it slides on the carrier paper, slide it off on to the area of the model the decal is to go. Wet the area on the model. If the area of the model is curvy you may have to apply some micro sol which is a softening agent. Apply the micro sol with a brush to the decal (while it is on the model) leave to soften for a moment and press to shape, add a little more micro sol if neccesary. When the decals have dried in place paint with some Tamiya clear to seal it to the model.
Some of the details which cannot be done with decals are best painted by using the pots of Tamiya or Humbrol acrylic.
Finishing Touches
We use small pots of Tamiya, Humbrol, Cytadel or Formula P3 acrylic paint. The latter two are use by wargames and are available from games workshop. Humbrol and Tamiya are widely available worldwide.
A couple of very small, good quality brushes are a must for all door handles, lights, windscreen wipers and other small details are best done last of all when the decals have dried into place.
Some of us like to enhance the body lines, doors, bonnets etc. This is done quite easily by applying acrylic black paint thinned down with water and applied to the line with a small brush and quickly removing excess with a piece of kitchen towell. Re apply the watered down black until you are happy with the result. It is important to do this before you apply decals. Like all other things practice makes perfect with this one.
Headlights can be improvedby painting some Tamiya clear over the silver, do not be afraid to put a good coat on.
Edwardian Chassis
 (1).jpg)
 (2).jpg)
 (3).jpg)
 (4).jpg)
 (5).jpg)
 (6).jpg)
 (7).jpg)
 (8).jpg)